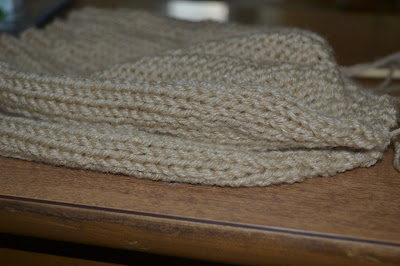
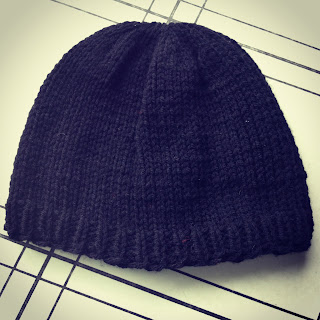
This is my very first free pattern, so please bear with me as I work out any details which are unclear or need explanation. Please comment if you find something that needs to be looked at.
What you'll need:
Size 10 needles
Medium weight worsted yarn *note that if you use a thicker yarn, adjust your needle size
Tapestry needle
Tape measure
Abbreviations:
K-Knit
P-Purl
K2TG-Knit 2 together
What to do:
CO 72 (this makes a large men's hat. Reduce the number of CO stitches in multiples of 2 to customize the sizing)
2X2 ribbing for 5 rows, or about an inch or so (for a longer brim, knit more rows of ribbing):
Row 1: *K2, P2* (*repeat across)
Row 2: same as row 1
Once your ribbing is complete, you will begin the body of the hat:
Row 1: K each across
Row 2: P each across
Continue these two rows for approximately 8 1/2". For a longer hat, or one with a folded brim, add a few inches to this. UPDATE: this makes it long enough for a fold over brim. If you want it without that option, lessen this to about 7".
Now, you will begin the decreases to form the crown.
Row 1: *K2TG, K2* repeat across
Row 2: P each across
You will continue this until there are 12 stitches left. With a tapestry needle and a long tail, weave the needle through the 12 stitches, being careful not to forget any. Remove the knitting needle and pull tight to close the hat. Do not cut the tail, as we will be using this to seam up the side.
Fold the hat with right sides together, so the outside of the hat is on the outside and line up the edges.
Now you are going to seam up the edge. Insert the needle into both layers of the hat, pull tight (but not so tight that it makes the seam uneven), bring the yarn in front of the work, and into the next stitch in the seam. There are a lot of great YouTube videos out there on how to seam up your knitting work. The mattress stitch method is a bit more challenging, but makes an invisible seam.
And guess what!? You're done! Congratulations on your newly knitted hat!
If you would like to purchase one of these hats, head on over to Crooked By Design and request one!


I love this easy pattern! Thanks so much! I've already made two as Xmas gifts
ReplyDeleteSo glad to hear that, Marcie! Thanks for stopping by :)
ReplyDeleteThank you for the pattern. I needed a pattern like this because I am going to make a bearded beanie for my husband. This pattern worked great. I did have to shorten the length. I probably knit too loosly. Thanks again.
ReplyDeletethis is a wonderful simple just right pattern.thanks for posting!
ReplyDeleteHow many yards of yarn do you need to make this?
ReplyDeleteI'm sorry I took so long to respond to this! Not sure the exact yardage, but I used Red Heart Super Saver, the normal size ball (not the huge one) and it doesn't take all of it.
DeleteSize 10 needles will make huge holes no?
ReplyDeleteThe first few pics show a lot smaller needles then a size 10.. ???? Help!!
ReplyDeleteThey are size 10 (6mm) needles.
DeleteHi, I would like to make the hat without the fold over brim. Should I go with the 8.5 inch or 7 inch instructions for the main body, and does it include the 1 inch ribbing? Any help is greatly appreciated!
ReplyDeleteGreat question and I'm glad you asked! It's been awhile since I've worked one up, but I believe that included the 1 inch ribbing. I'll have to work up another and re-measure and then I'll post an update.
DeleteTook me time to read all the comments, but I really enjoyed the article. It proved to be Very helpful to me and I am sure to all the commenters here! It’s always nice when you can not only be informed, but also entertained!
ReplyDeletebest black friday deals online
Is the guy in the picture named Gabriel? He sure looks like a guy I know. If it isn't it must be his double.
ReplyDeleteThat's so funny! No, not a Gabriel. My husband must have a double out there somewhere!
DeleteWhat a wonderful easy pattern ! your instructions were to the point and easy to follow. I am so happy with the result.My first beanie a success YAY!!! Thank you so much keep well Janice South Africa
ReplyDeleteThank you for the easy beanie pattern. I found this pattern a few years ago. I knitted my hubby the beanie and he loved it. Unfortunately I misplaced the pattern, lucky for me I found it again. Starting right now to knit hubby and myself a beanie. Thanks a million. Vanessa from South Africa
ReplyDeleteThank you for this pattern. I just started knitting again after fifty yrs and am looking for something easy for me sons and husband and this looks like I found it. thank you
ReplyDeleteI haven’t any word to appreciate this post.....Really i am impressed from this post....the person who create this post it was a great human..thanks for shared this with us. knitting factory
ReplyDeleteThis sort of looks like without a doubt wonderful. A lot of these microscopic truth is built utilising combination in qualifying criteria know-how. As i support the objective a whole lot. debt relief companies
ReplyDeleteHey what a brilliant post I have come across and believe me I have been searching out for this similar kind of post for past a week and hardly came across this. Thank you very much and will look for more postings from you. Nieuw-Zeeland ETA Visum
ReplyDelete