
Christmas came and went and we still hadn't gotten made our garland. One afternoon-on a day I could tell the kids needed an uplifting project or the witching hour would last all day-we decided there was no reason these had to be a holiday project! We can make orange garlands all year long! So we got to work and oh-my-goodness, we are hooked!
I posted our finished product on Instagram and got some questions on how we made it so I figured this how-to may be helpful if you're thinking of making one (or three). It's really very easy.

All you need is:
-oranges! I found when they were cold they were easier to slice
-twine, string, bakers thread, anything to use for the base
-a darning needle (I used one from my knitting bag, any needle you can fit your string through so you can easily thread through the dried oranges)
-your oven
-a baking sheet
-tin foil or parchment paper
-paper towels
Start by preheating the oven to 250 degrees. I lined my cookie sheet with tin foil but this was a precaution. If you start this project and realize you don't have any on hand, I bet it would work without it. Slice up your oranges. I used two oranges for one garland. It's better to make too many than not have enough because you'll likely end up with a few burned ones you will toss. I believe I used four oranges total, and I made two garlands.
*Just in case you're not sure what a darning needle is, you can find them here. I have tons of them because of knitting, but you just need one. Walmart, AC Moore, any craft store, will have them too.


You'll want to grab a paper towel and pat them dry on both sides. The more dry you get them, the less time they'll take. Once you line them on the pan, just pop them in the oven and enjoy as your home fills with the most wonderful aroma! Check on them every so often, but mine took about two hours to dry the way I wanted them. Honestly, I took them out a tiny bit early for fear of burning them but they have been strung up for weeks now and they're still perfect. I had about three slices I had to toss because they were darker than I wanted, but other than that, they came out perfect!
To make this project even more frugal, be sure to toss your orange remnants in a jar and fill it will vinegar. I do this to make my all purpose cleaner. More about that can be found on this post.


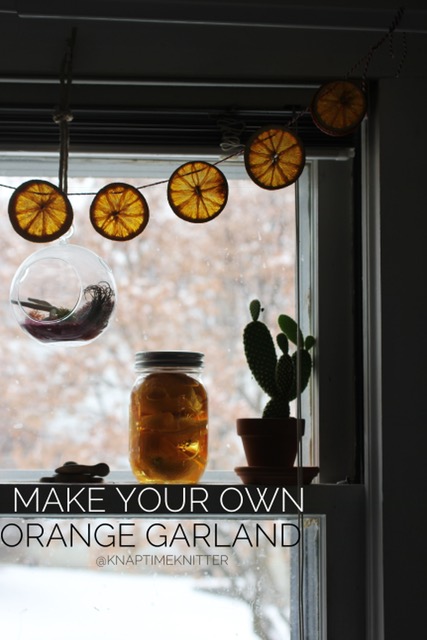
Once they're dried and cooled (I let them cool overnight but that's only because I got side tracked), I grabbed some baker's twine I had kicking around and weaved a darning needle through the top. There really isn't an art to this. Any way you choose to get the string through is fine! You could even poke a hole with a knife and string it in that way. For these garlands, I simply inserted the threaded needle into the front, pulled through the back and then poked it back through the front. It's ok if it's not exact. That's the beauty of this project! Imperfections are totally ok.


We enjoyed this project so much, we hung one garland over our kitchen sink and another in our bedroom. Where will you hang yours?
I hope you enjoyed this little DIY project as much as we did! If you do make one and post on Instagram, I'd love to see it! Simply tag me @KnaptimeKnitter. I can't wait to see!


Post a Comment